Summer is the season for vibrant colors, playful aesthetics, and convey your personality through fun beauty drift. Among the most democratic plan that pop up every yr when the temperature rises are Watermelon Nails. This fruit-inspired nail art is not only visually refreshing but also improbably versatile, supply to everyone from minimalist fans to maximalist nail art partisan. Whether you are heading to a beach company or simply need to add a splash of sweet to your daily routine, this designing is the perfect option for a gay inclination.
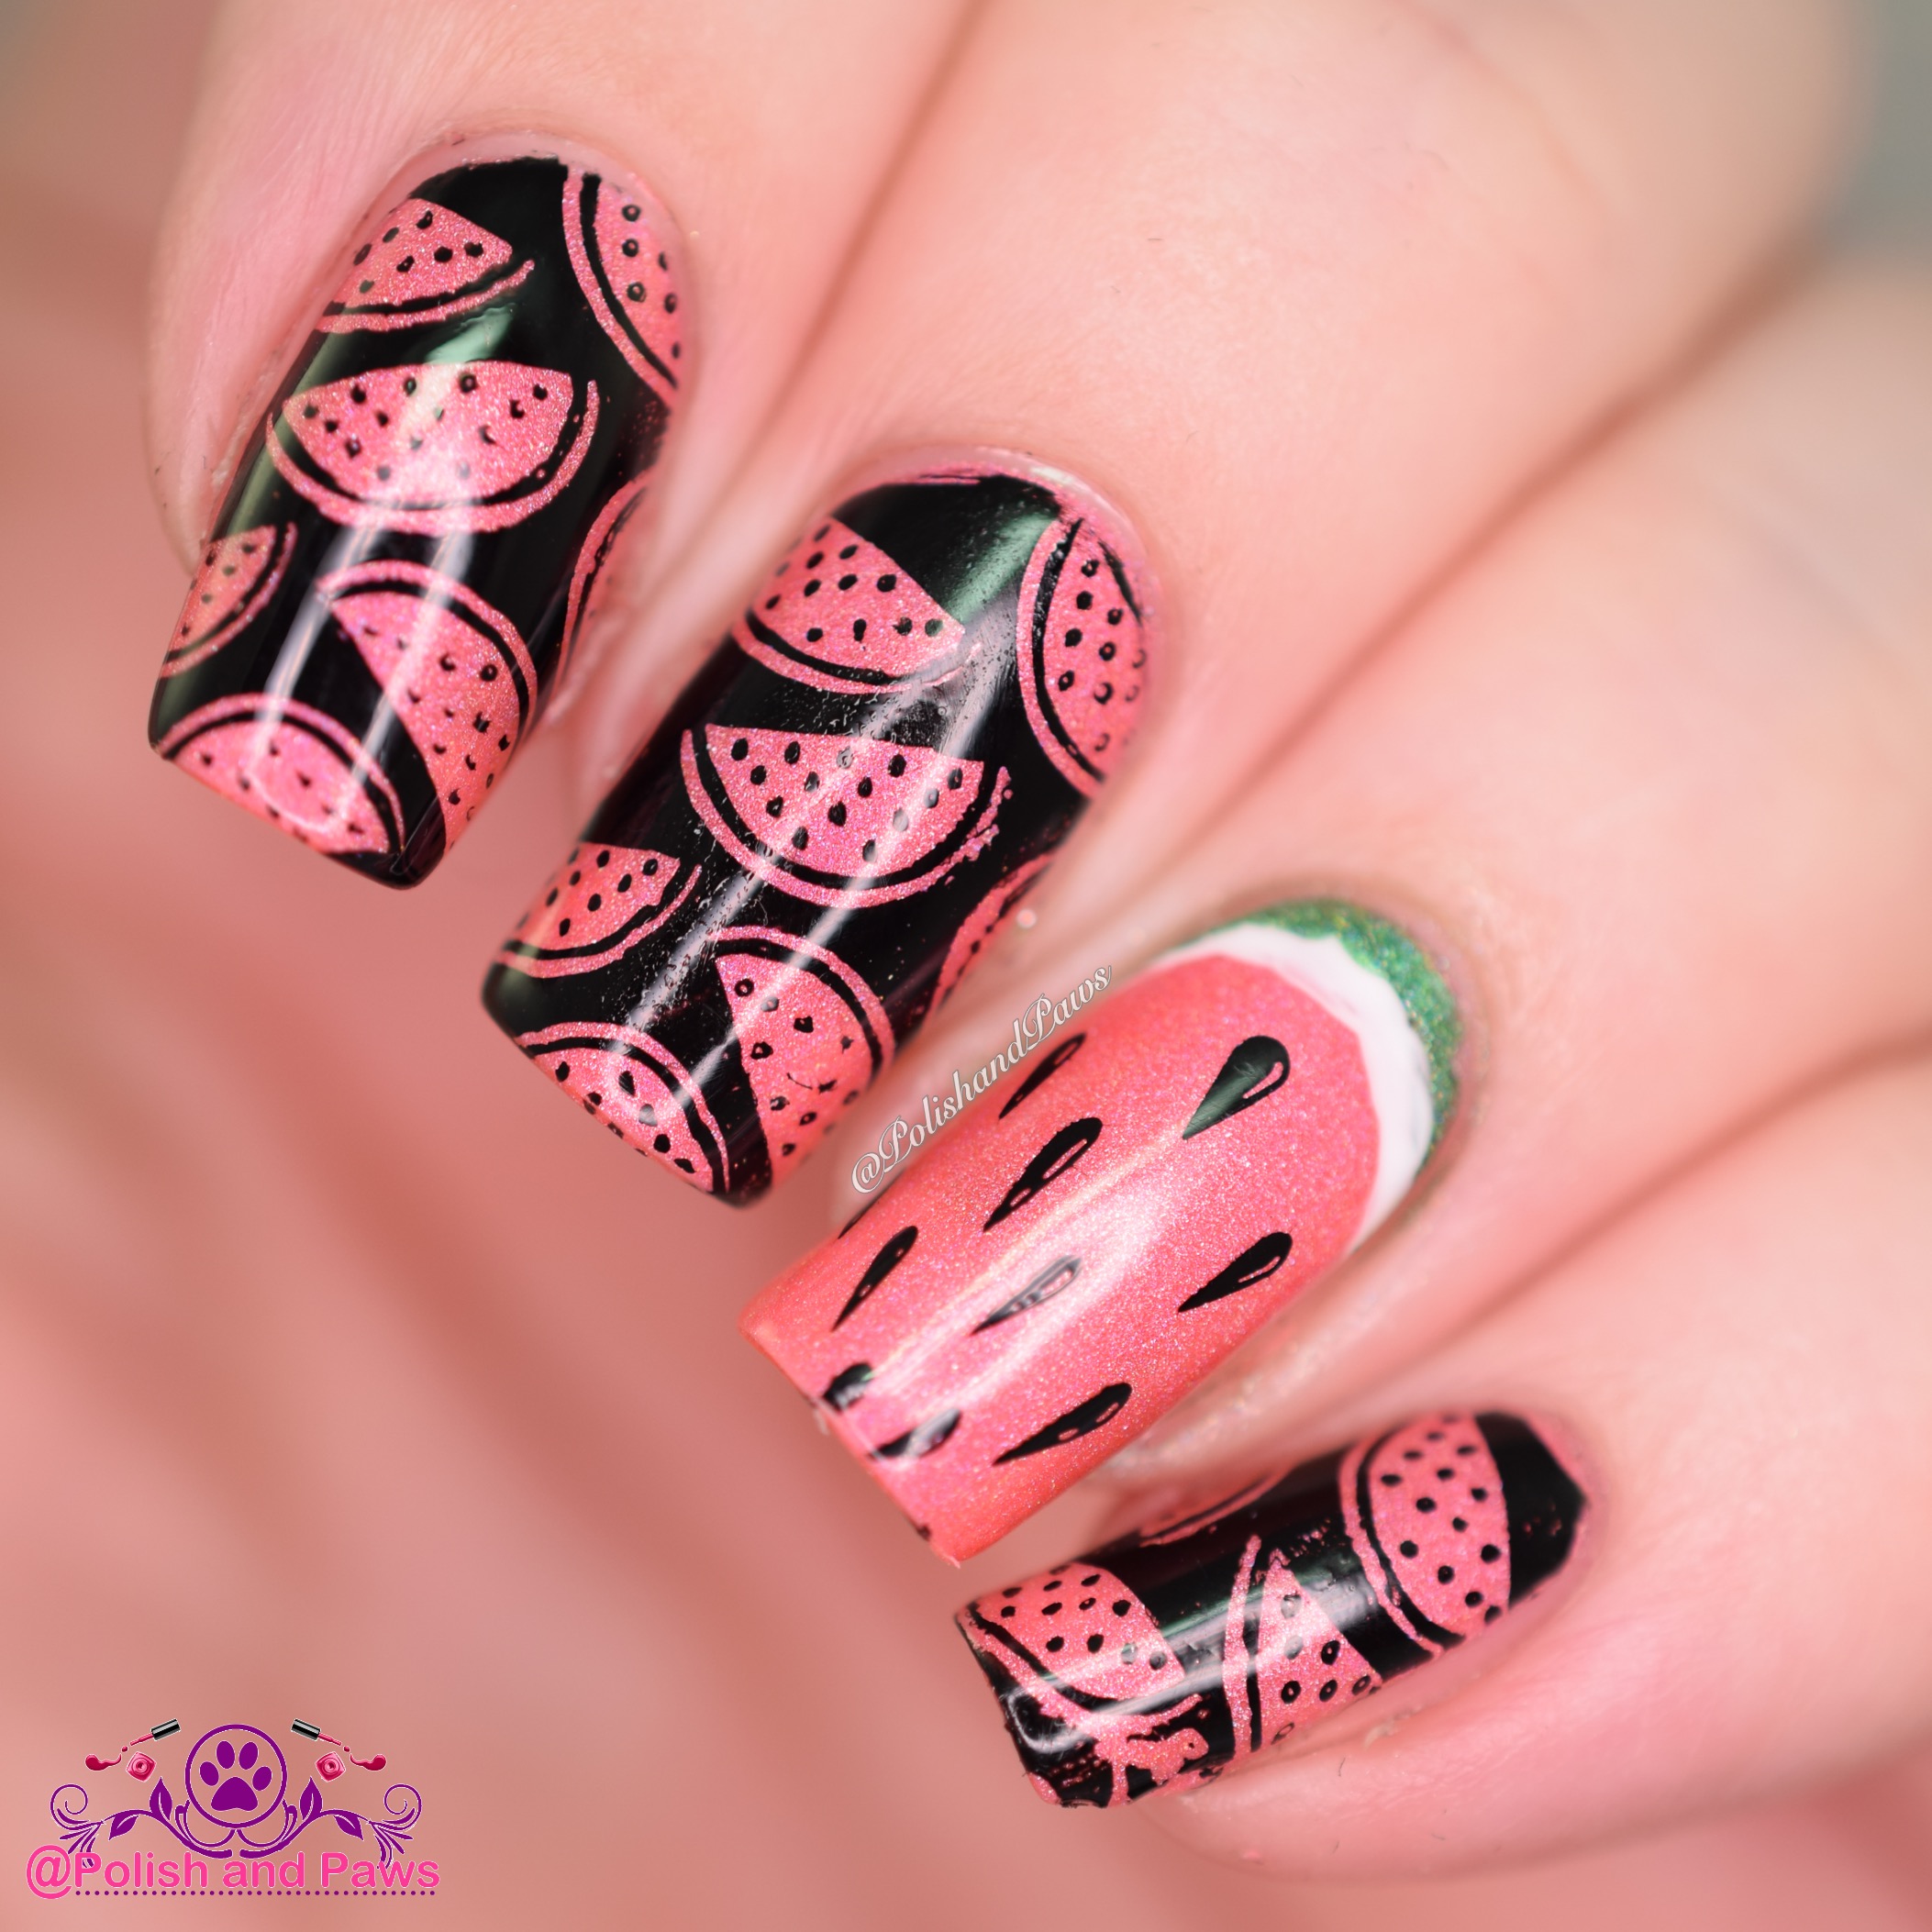
Why Watermelon Nails Are a Summer Must-Have
There is something inherently pollyannaish about the combination of bright pinko, lush green, and crispy white. These colour extract feelings of picnics, pond days, and long, lazy afternoons. Beyond the esthetics, Watermelon Nails are a fantastic way to practice your DIY nail art skills. The pattern is composed of elementary shapes - a semi-circle or an almond shape - making it an splendid task for tiro who are just memorize how to use a dotting tool or a lean liner brush. Moreover, the designing act perfectly on any nail length, from little, natural nail to yearn, spectacular extensions.
Essential Tools for Your Watermelon Manicure
Before you commence your nail art journey, it is significant to accumulate the correct supply. You do not postulate expensive professional equipment to achieve a high-quality looking. Here is a checklist of detail you will likely need:
- Base Coat: To protect your natural nail from staining.
- Pink or Red Polish: The flesh of the watermelon.
- Bright Green Polish: The rind of the watermelon.
- White or Cream Polish: For the inner rind detail.
- Black Polish: To make the touch watermelon seeds.
- Scatter Tool or Toothpick: For precision in put seeds.
- Fine-Tip Liner Brush: For unclouded line and detailing.
- Top Coat: To seal your design and add shine.
Step-by-Step Guide: Creating the Perfect Design
Creating Watermelon Nails is a process that rewards patience and steady manpower. Follow these stairs to ensure a salon-quality polish:
- Preparation: Clean your nails, thrust backwards your cuticles, and apply a bag coating. This creates a suave canvass.
- The Substructure: Apply two coat of your elect pink or red finish. Allow it to dry completely.
- The Rind: Using a fine-tip brush, paint a thin arc of white polish along the tip of your nail. Once dry, layer a somewhat thick arc of immature polish over it.
- Impart Seeds: Dip a toothpick or dust tool into black polish. Cautiously place small, teardrop-shaped dots along the pink subdivision. Maintain them scattered for a natural expression.
- Sealing: Formerly all layer are dry, use a generous layer of high-quality top coat. This protect your art from nick and gives it a professional sheeny finis.
💡 Tone: If you sputter with rickety manpower, try expend nail art toughie or decalcomania to achieve the seed pattern instead of paint them manually.
Design Variations for Every Style
While the classic watermelon slice is a crowd favorite, there are many manner to twist the design to fit your personal manner. You can opt for a "French tip" way where alone the wind of your nail sport the yield pattern, or go for an accent nail coming where solely the doughnut finger has the watermelon design while the others remain a solid colour. If you prefer a more subtle look, try a "negative infinite" plan where you leave part of the nail unpainted to create a modern, minimalist esthetic.
| Design Style | Complexity | Best For |
|---|---|---|
| Graeco-roman Slice | Easygoing | Initiate |
| Gallic Tip | Medium | Professional settings |
| Negative Infinite | Eminent | Mod minimalist look |
| Full Coverage Pattern | Medium | Summertime vacations |
Tips for Longevity and Maintenance
To ensure your Watermelon Nails look fresh for as long as possible, proper aftercare is indispensable. Avoid sustain exposure to coarse chemical or hot h2o, as these can soften your polish and cause premature peeling. Create it a habit to utilise cuticle oil every night to maintain your nails hydrate and potent. If you remark any chips, you can unremarkably stir them up with a diminutive bit of matching polish and a fresh coating of top coat to extend the life of your manicure by respective days.
⚠️ Line: Always wait for the colorful polish to get completely "brassy" dry before applying your top coat to prevent smearing the intricate seed details.
Final Thoughts on the Trend
Embrace seasonal trends is one of the most delicious aspects of self-care. Watermelon Nails offer a refreshing fault from neutral timbre and allow for a playful experiment with color and geometry. By follow the planning stairs and take your time with the finer details, you can accomplish a advanced and fun look that captures the very essence of summer. Whether you are painting them yourself at home or showing these ideas to your favorite nail technician, remember that the destination is to have fun and showcase your vivacious style. Experiment with different shades of pink, try out matte top coats for a different texture, or contain sparkle to get your watermelon seeds sparkle. Irrespective of how you prefer to style your manicure, this fruity design is guaranteed to bring a smile to your face and a bright tone to your summertime wardrobe.