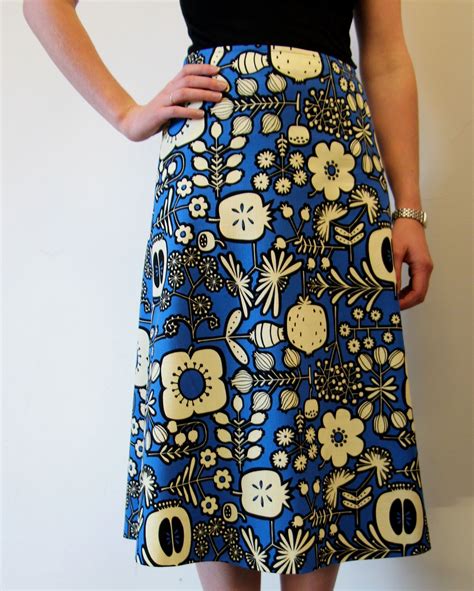
The A-line skirt remains a timeless staple in every wardrobe, celebrated for its universally flattering silhouette that gently flares from the waist toward the hem. Whether you are a beginner looking to hone your sewing skills or an experienced garment maker wanting to add a custom piece to your collection, learning how to draft and sew an A-line skirt pattern is an essential skill. Its structural simplicity makes it the perfect project to experiment with different fabrics, lengths, and personal customizations. By understanding the geometry behind this classic design, you can move away from store-bought garments and embrace the world of personalized, high-quality fashion.
Why Choose the A-Line Skirt Pattern?
The appeal of an A-line skirt pattern lies in its versatility and ease of construction. Unlike pencil skirts that require complex darting and precise fitting for movement, or circle skirts that can be difficult to hem, an A-line skirt offers the perfect balance. It provides enough room for comfort while maintaining a sleek, structured appearance that works for both professional settings and casual weekend outings.
- Versatility: It looks great in denim, linen, wool, or cotton, making it a year-round garment.
- Accessibility: The pattern is relatively easy to draft, requiring only a few body measurements.
- Customization: You can easily modify the flare, add pockets, or play with waistline finishes like facings or waistbands.
Choosing the right fabric is critical for the success of your project. For a beginner, a mid-weight cotton or linen is ideal because it holds the skirt's shape well and is easy to press during construction.
Essential Measurements and Tools
Before you begin drafting your A-line skirt pattern, ensure you have the necessary supplies. Precision at this stage prevents fitting issues later. You will need:
| Tool | Purpose |
|---|---|
| Measuring Tape | To take accurate waist and hip measurements. |
| Pattern Paper | For drawing your drafting template. |
| French Curve | To smooth out the waist and side seam lines. |
| Clear Ruler | To maintain straight lines for the grainline. |
To start, take two primary measurements: your waist circumference and your hip circumference. Determine your desired length from your natural waist down to where you want the hem to hit. Keep in mind that a standard A-line skirt usually sits at the natural waist, which is the narrowest part of your torso.
💡 Note: Always add at least 1.5 inches of "ease" to your waist and hip measurements. This ensures the skirt is comfortable when you sit down or move throughout the day.
Drafting Your Custom Pattern
Drafting an A-line skirt pattern involves creating a basic sloper. Begin by drawing a vertical line on your paper, which represents your center front. From this line, you will measure out one-quarter of your waist and hip circumference plus the ease you calculated earlier.
Connect your waist point to your hip point, and then extend that line down to your desired length. To create the iconic "A" shape, flare the side seam outward by 2 to 4 inches depending on how much volume you desire. Use your French curve to blend the waistline so it isn't too angular, which helps the garment sit smoothly against the body.
Don't forget to mark your grainline parallel to the center front. This is crucial for ensuring the fabric hangs correctly without twisting or sagging during wear.
Fabric Preparation and Cutting
Once your paper pattern is ready, it is time to prepare your fabric. Always wash and dry your fabric before cutting, as many natural fibers like linen and cotton will shrink. Once pressed, fold the fabric selvedge-to-selvedge. Place your A-line skirt pattern pieces on the fabric, ensuring the grainline arrows align perfectly with the fabric's straight grain.
- Pin the pattern securely to prevent shifting.
- Use sharp shears to cut around the pattern pieces.
- Transfer all notches and markings onto the fabric using tailor's chalk or small snips in the seam allowance.
Consider adding a lining if you are working with a thin or slightly transparent fabric. A rayon lining will prevent the skirt from clinging to your legs, creating a much more polished finish.
Sewing the Skirt Together
Start by pinning the side seams, right sides together. Sew along the seam allowance, typically 5/8 of an inch. Press your seams open; this step is often neglected, but it is the secret to professional-looking, custom-made clothing. Once the main structure is sewn, you can attach the waistband or finish the waist with a facing.
For the hem, fold it up by 1 inch and press, then fold it another inch to tuck the raw edge inside. Use a blind stitch for an invisible finish, or a straight stitch for a more casual, top-stitched look. Remember to try on your skirt before finishing the hem to ensure it hits exactly where you want it.
💡 Note: If you are adding a zipper, install it before closing the final side seam to make the process much easier for your sewing machine's presser foot.
Final Thoughts on Your Project
Creating your own A-line skirt pattern is a rewarding journey that connects you with the roots of garment construction. By focusing on accurate measurements, proper fabric preparation, and diligent pressing throughout the sewing process, you produce a garment that fits better than anything found on a retail rack. As you become more comfortable with this basic shape, you can begin to experiment with adding pockets, pleats, or even changing the flare to create different aesthetic profiles. The beauty of sewing lies in the ability to refine your process over time, turning a simple piece of fabric into a reflection of your own style and expertise.
Related Terms:
- simple a line skirt pattern
- a line skirt pattern simplicity
- basic a line skirt pattern
- a line skirt pattern pdf
- a line skirt measurements
- a line maxi skirt pattern